I’m working on a weapon for one of my characters from my online novel True Tales of the Soryan Order, and I started it as a vector from Adobe Illustrator. I thought I’d write this up because it took me a while to figure out a reliable method.
I should say that I’m using Illustrator CS4, but you should be able to do this probably all the way back to version CS. Also, I’m using Blender 2.49b. I tried using the 2.5 Alpha, but it didn’t look like all the import options were in there yet.
It shouldn’t matter, though. Once you get the path in there, you can always just open that file in the 2.5 Alpha.
To begin, first of all, Blender actually has some pretty decent vector tools, so I could have drawn the shape right in there. The thing is, I’m much more proficient in Illustrator and using the modifier keys in there, so it’s quicker and easier for me to create any shape I want in that program.
Working with the Bezier curves can be an ordeal for the neophyte, so if you’re just starting and have trouble with it, don’t feel bad. I felt the same way when I started over 10 years ago. They have a logic to them, but it’s hard to see that logic at first.
Anyway, let’s just say you have your shape finished. I try to always stick to one enclosed shape, if possible. Blender sometimes starts causing trouble if you try to import too many paths that aren’t connected.
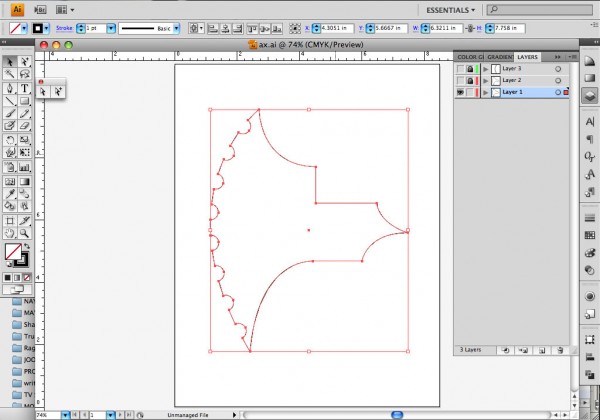
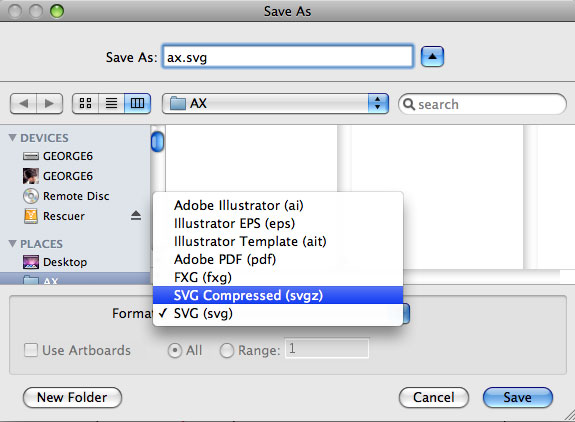
So, I now need to save this file as something that Blender can import. It sure looks like Blender can import a whole bunch of files, but to me the only one that works consistently is to save as a compressed svg file (.svgz).
So you’ll go to ‘File>Save As…’, then choose SVG Compressed (svgz) from the ‘Format’ menu.
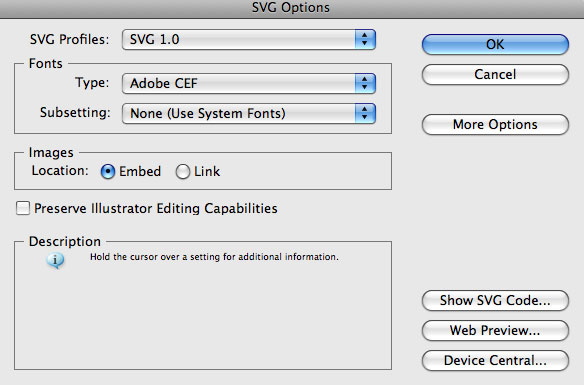
You’ll get another dialogue window that pops up. I actually don’t touch anything in here, I just click the “OK” button.
So now your .svgz file is exported, and you can bring it into Blender now.
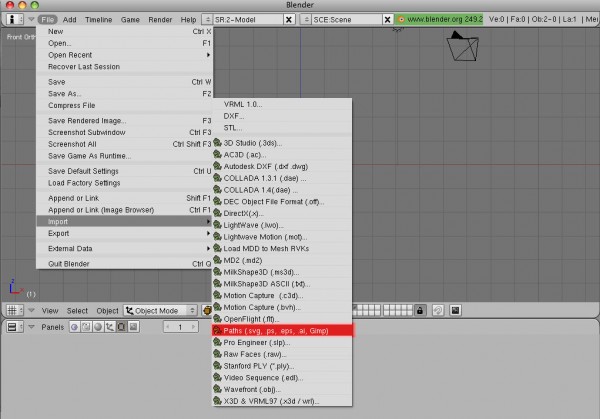
Once Blender is opened, you’ll go to File>Import>Paths (.svg, .ps, .eps, .ai. Gimp),
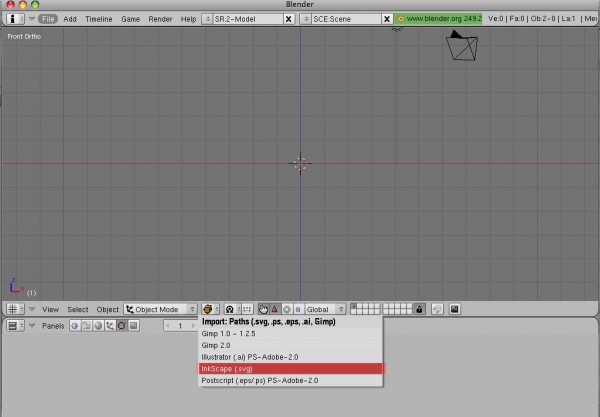
then you’ll have to choose “Inkscape (svg)” from the next drop down that appears.
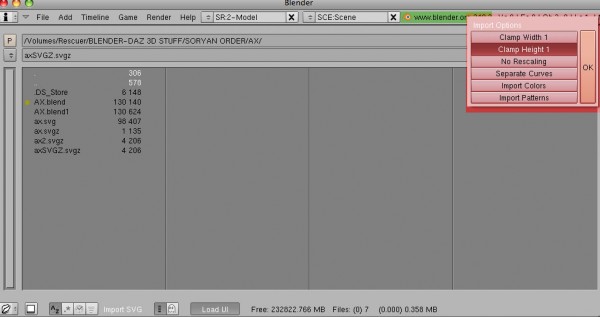
then navigate to wherever you saved your .svgz and select it, then click the “Import SVG” button that should appear in the top right.
Clicking this will pop up another dialogue with some import options. You’ll want to make sure that you choose one or both of the “Clamp Width/Height” buttons, otherwise your path could come in huge. So huge you can’t even see it without pressing the Home key to fit everything into the screen.
Sometimes choosing “Separate Curves” has helped me when I have a stubborn path with some sort of “Ghost” paths in it.
What I mean by this is if in Illustrator, you did a lot of Pathfinder operations such as Subract/Add and others, then the shapes that you added or subtracted may come along for the ride in the .svg file.
I’ve found that choosing the compressed .svgz file usually solves this, but sometimes Blender decides to act crazy and the “Separate Curves” button seems to help with that. Not always, though.
Anyway, once you do this, you’ll probably find that you can’t see your path from the front view. Normally I have to press 7 for top view in order to see it.
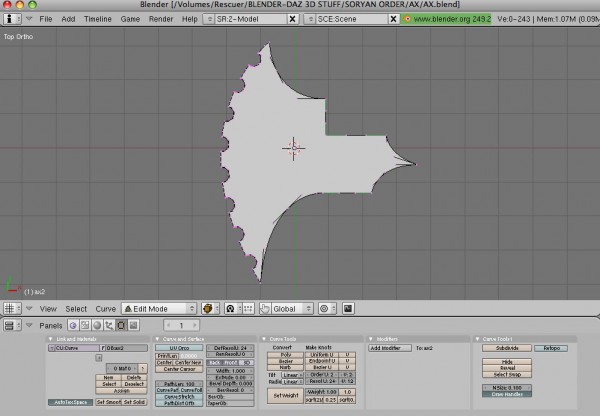
Something that always happens to me is that the center of my object is off somehow. I usually have to tab into edit mode and re-center the piece. I think there’s a key-command for that but I usually just do it that way using the grab key (G).
So now your path is in Blender, but here’s the thing -it’s not a mesh yet. Blender imports these paths as a curve object, you’ll see this right away when looking at the object. The bezier handles are there on the vertices.
If you’re lucky, you might be able to get away with leaving it as a curve. My work usually demands that I have a mesh so I have to convert it by selecting the curve and pressing “alt/option-c“. This will pop up a box that says “Convert Curve to Mesh?” You’ll accept this and now you’ll have a mesh instead of a curve.
Except now the new problem you’ll have is that when Blender converts an object to a mesh, it always wants to do it in the least efficient, butt-ugliest way possible. You’ll end up with about 1,000 vertices when 200 would work fine, and about 10,000 haphazardly created triangle faces when you need to have orderly, neat quads.
UPDATE: I tried opening my curve-object file in the 2.5 Alpha, hoping that the mesh conversion might work a little better than in 2.49b. Unfortunately it does not, it’s pretty much exactly the same, so no help there. :(
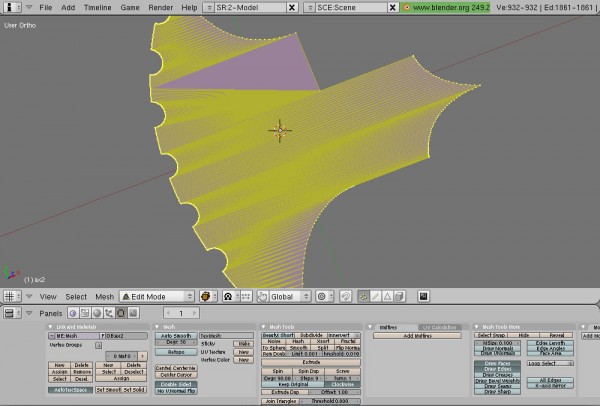
Frankly, as far as I can tell, there’s no easy way to deal with this problem. I usually just go in and start hollowing out the offending triangles, then starting to fill in with quads in the most efficient way possible.
That will be a post for another day, but for now just let me know of any questions regarding importing.
QM59XEYU3R2M

try setting the resolution of the curves a bit (maybe too) low. then convert and the rest you can do with loop cuts and subsurf. I guess?
anyway thanks for the tutorial. this was really helpful!
Hey Cedal,
Yeah man it’s quite the ordeal. I haven’t got this one to work yet but I’ll try your suggestion and see if that helps the problem.
Glad this helped you out!
Good God that makes some ugly meshes! The good news is, I survived them. Thanks for the tips on this one!
What i normally do is make a copy before the conversion (to mesh), then overlay the flat curve over the multitude of triangles that occurred from converting to mesh.
Hey dreykk,
so when you’re saying “overlay” the curve, you’re just literally lining it up right on top or is that a Blender feature?
How does that help to mitigate the “crappy mesh/triangle” problem? Thanks for your input!