
We’ve all done it before: Get up in the morning, head off to work, and only when you’re ten miles away from home do you realize you forgot to get your torrents downloading with your Transmission client. You’re probably just like me, you like to have things downloaded and ready to watch when you get home, so it’s kind of annoying when you have to wait.
The Transmission Web Interface provides another way. Using this feature you can log in to your Transmission client from any computer with web access.
A couple of caveats you’ll need to allow for:
- Your computer must (of course) be left on
- Transmission web interface must be enabled in your Transmission client
- Your router/firewall must be configured to allow incoming requests on the specified port
At this point in time, I’m using Transmission version 2.13 (11501) on OSX 10.5.8. So, with that all said, let’s get into it!
THE BASICS
- Turn on web service in Transmission. You’ll need to go to the top menu and choose Transmission>Preferences…, and when the Preferences widow opens, choose Remote on the top right. You’ll see the below screen.
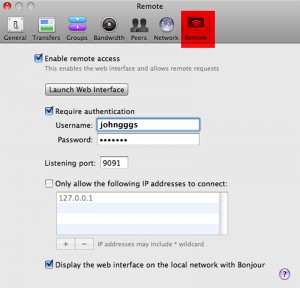
The Transmission Preferences "Remote" screen (click to view larger) - So here you’ll check the Enable Remote Access box. This will turn on the Web Interface. If you click the Launch Web Interface button now you’ll see it pop up in your default browser. All the torrents you have going right now will be visible.
- Notice that it just pops up right away. You don’t want this to happen without some kind of protection, so you should check the Require Authentication box, then put in a username/password combination that works for you.
- Now if you click the Launch Web Interface button now you’ll see that you’re challenged by an authentication dialogue asking for your username and password. That’s what we want so that not just any Joe Schmoe can get at your torrents.
- Take note of the port number in the Listening Port box in this screen. You’re going to need that number for accessing Transmission from outside of your network later on. You can change the default number if you want, as long as it isn’t a commonly used port for something else.
- If you’re certain you’re only going to be connecting from a specific outside machine and you know it’s IP Address, you can put that in the box that says Only allow the following IP addresses to connect: You’ll need to check the checkbox, then click the plus sign at the bottom to add the number. This severely limits the chance of intrusion but I’d still recommend using the username/password combo as well.
- Turn on Bonjour (if you want). I only have one machine on my network so this isn’t worth it to me, but if you have several machine it might be worth it to turn on the service by clicking the checkbox at the bottom that says Display the web interface on the local network with Bonjour. Doing this allows your web interface to be “discovered” easier without configuration by other machines on the network.
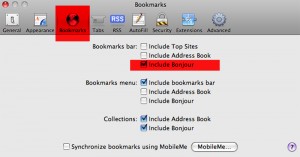
- Turn on Bonjour in Safari (if you want). Using Safari, you can quickly get to the web interface. To set this up you’ll need to (in Safari), choose from the top menu Safari>Preferences… then choose the Bookmarks tab. In here I chose the Include Bonjour checkbox in the Bookmarks Bar section at the top.
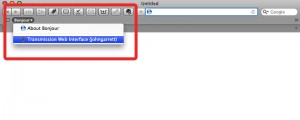
Once you do this, you’ll see that the Bonjour menu is included at the left of your bookmarks in your bookmarks bar. Clicking on this will show a menu item called Transmission Web Interface (username). Selecting it will bring you to the web interface as before.
Now that sets you up for internal traffic on your own network. Now we’ll look at getting set up to access the web interface from another computer outside of your home.
Getting EXTERNAL ACCESS to your machine
The key to this step is knowing your computer’s IP ADDRESS, or the number that identifies your machine on the internet.
If you don’t have a router/firewall, this is fairly easy. You can go to your System Preferences by choosing (from the top menu) Apple Menu>System Preferences… and then choosing the Network icon from about the middle row.
This will show you a whole list of numbers. The one you want is just called “IP Address”. If you don’t have a router/firewall, it will probably be in a format such as 175.xx.xx.xx or perhaps 64.xx.xx.xx or similar. If you have a router you’ll see your number as 192.xxx.x.x or similar. The “192” number won’t work from outside so you’ll need to find out your actual IP. Not to worry we’ll cover that a little later.
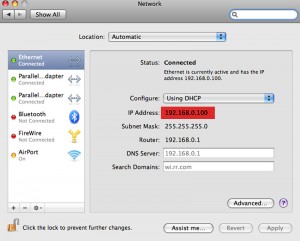
The problem here is that unless you’re specifically paying for a STATIC IP (which always remains the same), most of us are using what’s called “DHCP”. What this means is that when you attempt to connect to the internet, your ISP (whoever you pay for internet access) assigns you a number at that moment. You’ll keep that number as long as you’re still connected.
When you shut down your computer, you (potentially) release that number back into the pool of available numbers. Your ISP is then free to assign that number to another customer when they want to access the internet. When you turn your machine back on and connect to the net, your ISP will then assign you a DIFFERENT number.
So you can see that the problem here is that your number is potentially always changing. If you’re diligent, this isn’t a problem, you just check every morning and take note of your number. But who really wants to deal with all that? There’s actually a better way.
There are free services on the web that deal with this specific problem. Two well known services are:
What these services do is allow you to assign a hostname (such as www.mysite.com) to your own home computer. This way, if your IP changes, you can still always get to your machine by using the host name. Also it’s easier to remember than using the numbers.
Both DynDNS and No-IP have free and paid services. The downside of the free service is that you can’t completely customize the hostname. They have a variety of hostnames you can choose from, but that’s the extent of the customizing.
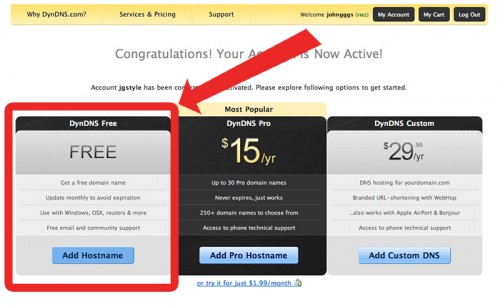
They keep the hostname pointed to your constantly changing ip address by installing a small program on you computer, which reports your number back to the site and updates accordingly when it changes. This way your free hostname will always point to your machine.
I actually use dyndns so I’ll walk through using that service.
USING DYNDNS for a hostname
- So the first thing you’ll need to do is go there (use the link above) and register at the site. Once you do that go ahead and login. Go to this link: http://www.dyndns.com/support/kb/dyndns.html if you have more questions about what the service is.
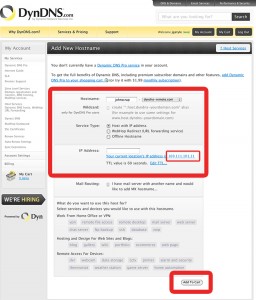
- Once ready, go here: https://www.dyndns.com/account/services/hosts/add.html to add your new hostname. One great thing bout this page is that it shows your actual IP Address so you don’t need to hunt for it.
- In the Hostname field, just type in whatever you want, then choose one of the free domains they provide. Like I said, it won’t be pretty, but it will be functional.
- For Service Type, choose Host with IP Address. Just leave the rest of the settings like I have in my screenshot.
- At the bottom click the Add to cart button. Don’t worry here, even though it’s a cart system, you will not be charged.
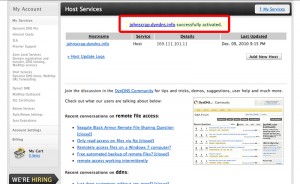
- On the next screen you’ll see that the price is “0.00”. Clicking “Next” here will activate the free domain name and you’ll see a message that says “yourhostname.dyndns.org successfully activated”.

Add hostname to cart page (click to view larger)
So for now you’ll be good to go. Except you’ll need to plan for the inevitable IP change from your ISP.
Using the DYNDNS UPDATER
To deal with this, you’ll need the free DynDNS Updater client from this url:
http://www.dyndns.com/support/clients/. This is how you do it:
- Download and install the program. If you’re going to be doing this alot, make sure to add it to your login items so it’s running all the time. Let’s walk through the steps of setting up the updater.
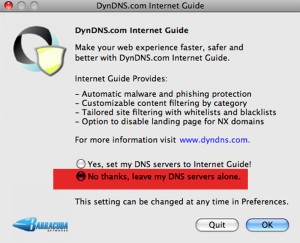
- Open up the newly installed program. When you open it for the first time, you’ll probably see a message like the below about changing your DNS server. I told it to leave my DNS servers alone, but you can do whatever you think is best for your situation.
- Enter your account info. The program will need your account info that you used when registering for the service. Go ahead and plug that in.
- Once you do this, you’ll get to the main screen of updater. It should populate with the host you set up via the web, but if it doesn’t, just plug that domain name in there and click the Refresh button on the top of the screen.
- I just leave the Interface menu on the default setting. If you click on it you’ll see a bunch of other options but I’ve never used any of them so you can just leave it alone.
Port Forwarding your router
If you have a router or firewall protecting your machine, you’ll most likely need to “forward” a port, or open up a port for your request to get through.
Essentially, your router/firewall is protecting you by blocking incoming requests except for safe basic web traffic. This means that if you try to get to your Transmission from outside of your network, it most likely won’t work as your router will block it.
So you need to instruct your router to open up a hole in its firewall to let your request in. This goes back to the number that was in the “Listening Port” field in the Transmission “Remote” tab in the preferences.
You’ll have to tell the router to accept incoming requests on that port and to direct it to a certain machine.
In my case I have a Mac and a PS3, so I have to put in the port number I specified and also tell my router to send it to the Mac, instead of the PS3.
I have a DLINK router myself, but you can get instructions for how to port forward for most routers at this link: http://portforward.com/dyndns/ (let me know if you still have questions).
Connecting to your machine
Well we should finally be all set up for administering Transmission via the web interface (whew!).
In order to get to your Transmission from outside, you’ll need not only the url, but the port number added to it as well. So your link will look like this:
http://johnscrap.dyndns.info:9091
Notice the colon and the “9091” at the end. That tells the server (your machine) “hey I want to come in on port 9091”. You’ll replace that number with whatever number you filled into that field in Transmission.
Now when you navigate there, assuming everything is working, you’ll be greeted with a username/password prompt (if you turned on authentication), and you can fill in whatever you chose for that info back in step 1.
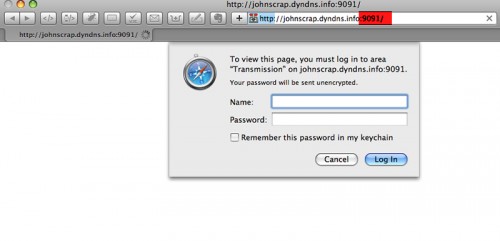
One you get in, you’ll see your initial web interface. If you have torrents in there, you’ll see them here.
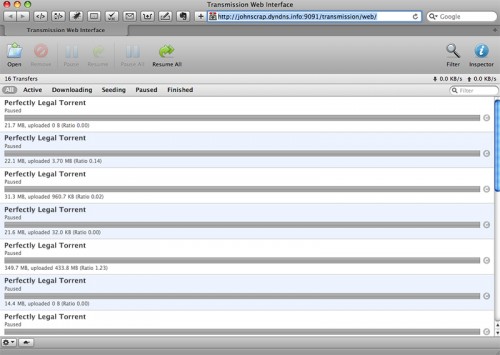
But the main reason we did all this was to add torrents that you hadn’t previously added.
- First you’ll need to download the torrent from whatever your favorite torrent site is. Or you can supply the url to the torrent if you want. I just downloaded the torrents as I usually do.
- Now click the “Open” button at top left. Choose the file from the hard drive of the machine you’re on, or paste in the url here. Once you click the “Upload” button, you’ll see your torrent added as usual.
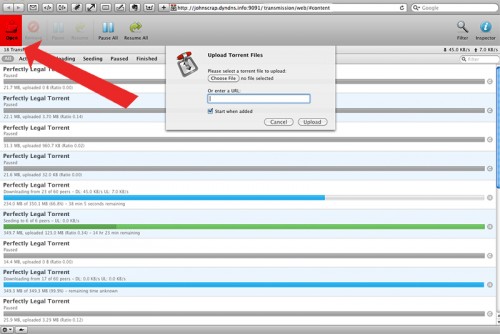
I’m not really sure where the torrent file goes. At first I thought it must download to your home computer, but I checked and it does not. I deleted the torrent files from the remote computer and it made no difference to the download. Hmmmm. Interesting.
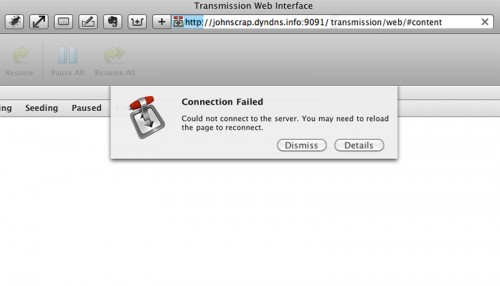
Also, sometimes you get a freaky connection error. I can usually fix it by reloading or quitting the browser and restarting.
FOOTNOTES
There’s just a few asides I wanted to bring to your attention.
Here’s the official Transmission forum on the Web Inteface:
https://forum.transmissionbt.com/viewforum.php?f=8
If you have issues you can check in there first to see if it’s already been resolved.
Also, many of you know to always run PeerGuardian or similar software when torrenting, but sometimes you just forget. Unless you’ve set up VNC on your machine you might not be able to turn it on remotely.
Luckily, Transmission has its own blocklist feature. Meaning it will use the same list as PeerGuardian and block the peers itself. You turn that on in the Peers tab in the Transmission preferences.
The thing about this is, the latest versions of Transmission don’t automatically supply the list anymore. You need to put in the address of a blocklist manually and then you should be able to keep it updated from there.
The only problem is, I’ve never been able to keep it updated automatically. Using info I gained from this thread:
https://forum.transmissionbt.com/viewtopic.php?f=4&t=10795
I was able to download a current level 1 blocklist from here:
http://www.iblocklist.com/list.php?list=bt_level1
The file is compressed with a “.gz” extension. The only way I could get it to work was like so:
- Unzip .gz file (uzipped file will be name “bt_level1”)
- Add “.txt” extension. Now file is named “bt_level1.txt”
- Move file to correct directory. The “bt_level1.txt” file goes in “/Users/username/Library/Application Support/Transmission/blocklists“. If Transmission is open, close it and restart. Once restarted it will have the populated current blocklist in the “Peers” tab in the preferences.
HOWEVER, I still couldn’t get it to update no matter what url I put in the field. Check the forum link above for more info on this. If you have this problem you’ll just have to be diligent in keeping it updated manually.
Once you get everything set up properly you should enjoy a lot more convenience with your torrenting and not worry about forgetting to start a download or add a new torrent.
So anyway, that should wrap up the whole process. It can be a lot to deal with at first, but just comment or contact me if you have questions and I can help out with it.



I never tried this steps before but after reading this article i can handle all the aspects. Thanks
You’re welcome, I’m glad you were able to get it working. Let me know if you have any other issues. Thanks for commenting!
Awesome!
I’m working on a vessel which Internet available but really slow.
With this method I can remotely download movies (with my wife help to turn on the PC of course ^^).
Thank you so much! Really clear and sufficient information.
You’re welcome Thai! Have fun downloading :)
thank you very much for this guide after i read the guide that you wrote, i try to do the same and i feel that there’s an improvement on my connection… continue and keep up the good work..
I really to find more on this subject I have subscribe to check. Also, splendid article. I want to read more of the columns on this wonderful website. more power and good luck
I enjoy your site – I would like to talk with you about buying ad space here granted you do that. Hit me up at the email I provided and we can talk about, thanks mate.
this is an awesome idea! i never really thought of that…haha so cool!
Awesome, never thought there are these easiest way here. Thank you for this post :)…watch movies online for free
thank you! for sharing this easy to follow guides. you are awesome!